
House Construction Process in India: From Design to Move-In
- Bigger and Bigger Team
- May 25, 2025
- 15 min read
Updated: Jun 9, 2025

Table of Contents
House Construction Process in India: From Design to Move-In
Phases of House Construction Process in India
Planning & Requirement Gathering
Budget Estimation & Financing
Permits & Legal Clearances
Site Preparation & FoundationConstruction Phase
Superstructure: Walls, Roof & Flooring
MEP Installation (Electrical, Plumbing, HVAC)
Plastering & Finishing Works
Interiors & FurnishingsPost-Construction Phase
Eco-Friendly & Smart Home Features
Addressing Common Concerns & Delays
Final Inspection, Handover & After-Sales Support
Conclusion
Building your dream home is an exciting journey, but the house construction process in India can be complex and time-consuming without the right planning. In India, a typical home construction involves many steps, from initial requirement gathering to final handover. Whether you’re in a bustling city or a quieter town, the basic process is similar: plan thoroughly, budget smartly, follow regulations, and work with the right team.
In this guide, we’ll walk through each phase of the house construction process, offering practical tips, timelines, and insider advice.. Along the way, we’ll also highlight eco-friendly options (like rainwater harvesting and solar power) and modern smart-home features (smart wiring, automation, security systems) to make your home efficient and future-ready.
Our Bangalore-based team at Bigger & Bigger Home Solutions (which serves clients across India) will show how transparency, personalization, in-house design/execution, and post-handover support make all the difference in a smooth construction journey.
Phases of House Construction Process in India
Pre-Construction Stage
1. Planning & Requirement Gathering
2. Budget Estimation & Financing
3. Permits & Legal Clearances
4. Site Preparation & Foundation
Construction Phase
5. Superstructure: Walls, Roof & Flooring
6. MEP Installation (Electrical, Plumbing, HVAC)
7. Plastering & Finishing Works
8. Interiors & Furnishings
Post-Construction Phase
9. Eco-Friendly & Smart Home Features
10. Addressing Common Concerns & Delays
11. Final Inspection, Handover & After-Sales Support
Pre-Construction Phase
This phase sets the foundation for your entire homebuilding journey. This Pre-Construction Phase involves planning, budgeting, legal checks, and site readiness before any physical construction begins.
1. Planning & Requirement Gathering
Every successful house construction process begins on paper. Start by defining your needs, wants, and constraints. List out your requirements – number of bedrooms/bathrooms, kitchen size, any special rooms (home office, gym), and style preferences (modern, traditional, etc.). Consider your family’s lifestyle: do you entertain often? Need space for elders or kids? Also think of future needs, like potential extensions.
Next, choose and evaluate your plot. The site dictates much of your design and cost. Check the location’s pros and cons: accessibility to schools, shops, workplaces, and public transport; neighborhood safety; and future development plans. Ensure the land has clear title (no legal disputes). You can verify this by getting an Encumbrance Certificate from the local sub-registrar – this proves there are no outstanding mortgages or legal claims. If the land was agricultural, you may need a “change of land use” or NA (non-agricultural) approval from the municipality.
Soil testing is also crucial at this stage. Have a geotechnical engineer test the soil to determine its bearing capacity and groundwater level. This will inform your foundation design (saving surprises later).
Throughout this phase, be transparent and flexible. Work with an architect or home designer (we have an in-house team) to translate your wish-list into a viable floor plan. A good architect considers Vastu (if you follow it) or sustainable orientations (for natural light and ventilation). Collaborate on 2D drawings and 3D models so you know exactly what to expect. A well-designed blueprint sets the stage for a smooth build. At Bigger & Bigger Home Solutions, our in-house architects ensure your house plan is both personalized to your needs and compliant with local building codes.
2. Budget Estimation & Financing
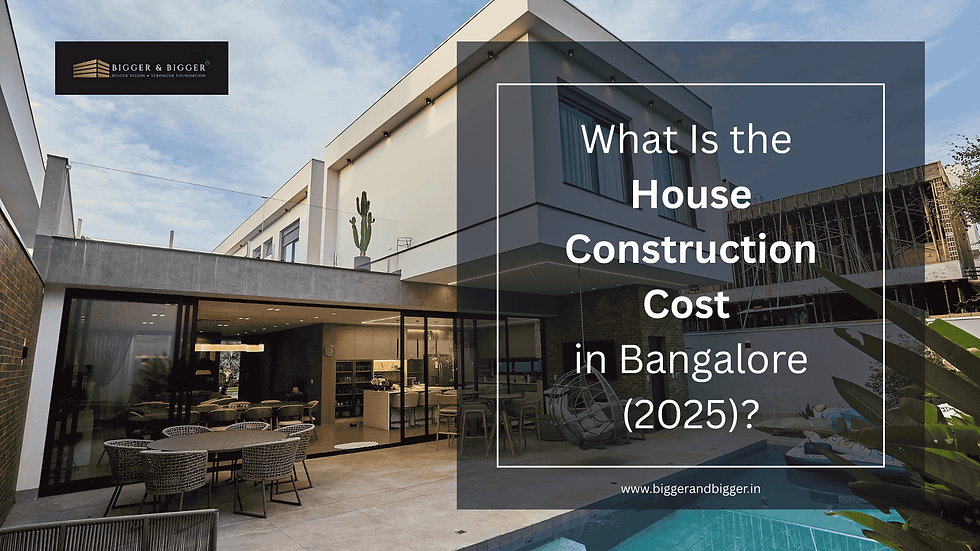
Budgeting is one of the most important parts of the house construction process. Without a clear estimate, even small expenses can derail your plans. Once you have preliminary designs, prepare a detailed budget estimate. Break down costs into broad categories: land (if not already owned), foundation and structure, interiors, finishes, fixtures, and so on. You can use per-square-foot estimates as a starting point. For example, in Bengaluru a standard construction package costs around ₹1,700–₹1,800 per sq.ft., while a premium package (better materials/designs) ranges ₹1,800–₹2,100 per sq.ft.. Across India, construction costs vary widely (₹1,300–₹5,000+ per sq.ft. depending on quality and location), but planning conservatively is wise.
Be sure to include:
Civil works (foundation, walls, slab) – often 30–40% of total.
MEP (Mechanical, Electrical, Plumbing) – roughly 10–15%.
Finishes (flooring, plaster, paint) – about 20–30%.
Interiors (kitchen cabinets, wardrobes, fixtures) – around 10–15%.
Fixtures & appliances (tiles, lights, sanitaryware) – factor separately.
Approvals and miscellaneous (architect fees, approvals, EB connection, solar panels, GST) – usually 5–10%.

For example, the table below shows an approximate cost breakdown:
Component | Approx. Share of Total Cost |
Foundation & Site Preparation | 10–15% |
Structure (Walls, Beams, Slab) | 30–40% |
Roof & Flooring | 10–15% |
Plumbing & Electrical (MEP) | 10–15% |
Finishes (Paint, Tiles, Plaster) | 20–30% |
Interiors (Kitchen, Wardrobes) | 10–15% |
These are rough guidelines for the house construction cost, actual costs will depend on your design, materials, and location. Always add a 10–15% contingency for unforeseen expenses (material price hikes, design changes, etc.). For example, if your planned total is ₹40 lakhs, keep an extra ₹4–6 lakhs aside as a buffer. This way, surprise costs won’t derail the project mid-way.
3. Permits & Legal Clearances
Before shovels hit the ground, ensure all legal paperwork and approvals are in place. This step is often time-consuming but non-negotiable. Key approvals include:
Land Title & Encumbrance Certificate: Verify ownership through title deeds and get an EC to confirm no legal encumbrances. If the previous owner hasn’t already converted agricultural land to non-agricultural (NA) use, you may need to get NA conversion from the local authority or town planning department.
Zoning and Planning Clearance: Ensure the land’s planned use (residential, etc.) matches your plans. A “zoning clearance” from the municipality or development authority confirms you can build a home there.
Building Plan Sanction: Submit the detailed house plan and structural drawings to the municipal corporation or local body for approval. This must comply with the Master Plan, building byelaws, Floor Area Ratio (FAR/FSI) limits, and other rules. Only after sanction can construction begin. Importantly, construction must follow this approved plan exactly – any deviation (even minor) without fresh permission can invalidate your project and invite penalties.
Commencement Certificate: In most cities, once the plan is approved, you’ll receive a Commencement Certificate. This formally allows you to start construction (usually valid for 2 years from sanction).
Other Clearances (as applicable): This could include water/sewer connections, environmental clearance (for large plots), fire NOC (if required), and an Energy Efficiency Certificate if mandated in your city.
Pro Tip: Work with a home builder or consultant who understands local regulations. At Bigger & Bigger, we guide clients through every legal step, saving time. We verify land records early (so you don’t discover title issues later) and ensure all authorities’ conditions are met. Having all clearances in hand not only prevents fines, it also reassures lenders if you’re taking a home loan.
4. Site Preparation & Foundation
Once paperwork is complete, the actual house construction process starts on-site with land preparation and foundation laying. With plans and permits in place, it’s time to prepare the site. This involves clearing the land of debris, vegetation, and leveling it. The surveyor will mark the building’s outline on the ground. Then begin excavation: digging trenches or pits for the foundation and footings. Good site preparation is critical for stability.
During this phase:
Soil Stabilization: If the soil is loose, compact it or replace it with lean concrete to prevent future settlement.
Rainwater & Drainage: Install temporary drains so rain doesn’t pool in excavations. Even before permanent systems are set up, ensure water is diverted.
Foundation Work: In India, the most common choice is an RCC (Reinforced Cement Concrete) foundation. This consists of steel reinforcement bars embedded in concrete footings and plinth beams. The design (isolated footings, combined footing, raft slab, etc.) depends on soil test results. Reinforce footings as per engineer’s design, then pour concrete in layers, curing each properly. RCC provides strength and durability against earthquakes and loads. For small houses, foundation costs are often around 10–15% of the budget. (Using modern materials like AAC blocks can even reduce foundation load, as lightweight blocks weigh much less than traditional clay bricks.)
Waterproofing & Termite Barriers: After concrete is cured, apply waterproofing to foundation walls and apply a termite barrier (BHC compound or termite mesh) at plinth level. This prevents dampness and termite entry in the future.
Always follow the engineer’s specifications for mix proportions and steel cover. Proper curing (watering the concrete) is vital for at least 21 days, this ensures the foundation reaches its full strength. Once the foundation is ready, the plinth (raised floor level) is constructed, and a thin layer of waterproofing is often applied on the plinth slab to prevent moisture.
Construction Phase
This is the execution stage where physical building takes place, from the ground up.
5. Superstructure: Walls, Roof & Flooring
With foundation ready, construction moves upward. The superstructure includes columns, beams, walls, slabs/roofs, and floors. Typically:
Columns & Beams: Erect vertical columns and horizontal beams using RCC. This creates the skeleton of your home. The placement and reinforcement are per structural drawings. Columns may be exposed or later encased in wall material.
Walls: Once the framework is set, start building walls. Common options are traditional clay bricks or modern AAC (Autoclaved Aerated Concrete) blocks. AAC blocks are lighter and offer better insulation than bricks, reducing the wall weight on foundation. They can also reduce brickwork plaster on interiors due to smoother surfaces. Whichever you choose, ensure mortar joints are properly filled and walls are plumb and level. Don’t forget spaces for doors, windows, and ducts. Embed conduits for electrical and plumbing as the walls go up.
Roof/Slab: For a flat roof, an RCC slab is cast over formwork and steel, matching the beam plan. For a sloping roof, timber or steel trusses are erected, then roof tiles or sheets are fixed on top. Ensure adequate waterproofing on the final roof (e.g., a mortar screed with sealant) to prevent leaks.
Flooring Base: After beams/slab, prepare floors. Cement screeds or leveling layers are done in each room to make the surface ready for final flooring (tiles, marble, etc.) in a later phase.
During this stage, integration of services is crucial. For example:
Electrical Conduits: Run conduits through walls and floors as needed for wiring. Plan for enough points for lights, fans, switches, and make provisions for any home automation control systems.
Plumbing Lines: Fix PVC or CPVC pipes for water supply and drainage inside wall chases. Ensure adequate slopes for drainage and insulation where pipes pass through exterior walls.
Structural work must comply with safety standards, use good-quality cement, graded sand, and corrosion-resistant steel. Adhering strictly to engineer specifications here prevents cracks or structural issues later on.
6. MEP Installation (Electrical, Plumbing, HVAC)
With walls and floors in place, finish the “hidden” installations: the electrical and plumbing systems (often called MEP: Mechanical, Electrical, Plumbing). This is a sensitive stage because these systems will be concealed later.
Plumbing: Install vertical risers and horizontal pipes for water supply (cold and hot), sewage, and stormwater. Test pipes for leaks and proper flow (pressure test). Waterproof wet areas (bathrooms, kitchen) using a waterproofing slurry before tiling.
Electrical: Install conduit pipes for all wiring. This is the time to plan for smart home readiness: we recommend placing conduits not just for standard power and lighting, but also for data/Internet cables, TV cables, and even multi-core wiring for home automation panels or security systems. Run extra conduits to future-proof for CCTV cameras or HVAC control lines. Set up the main breaker panel in a convenient utility area, with space for adequate circuit breakers and earthing bus bars. It’s also wise to include an MCB (mini circuit breaker) for the solar panel inverter (if you plan solar), and an EV charging point if you own an electric vehicle. (Solar systems often get installed after main construction, but the wiring from roof to the inverter should be in place now.) In fact, India’s new residential solar scheme offers up to 40% subsidy on rooftop solar installation costs, so many homeowners plan solar from day one.
HVAC & Other Services: If you plan air conditioning, install sleeves and spaces for AC pipes and vents. For security, embed wires for door sensors or alarms. For fire safety, consider wiring for smoke detectors.
This stage is also when rough-frames of doors and windows are fixed. Double-check all electrical points and plumbing fixtures are in the correct locations. Once MEP is signed off, it becomes very hard (and costly) to make changes, so verification is key.
7. Plastering & Finishing Works
Now the “messy” hidden work is done, the focus shifts to finishes that shape the look and feel of your home.
Plastering: Internal walls are plastered (usually with a 1:6 cement-sand mortar) to get smooth surfaces. External walls get a weatherproof plaster (often 1:5 cement-sand) to protect against rain. Allow each coat to dry and cure properly to prevent cracks.
Flooring: Lay floor tiles, marble, or other flooring as per your design. This includes skirting along the edges. Grout and clean the floors after installation. Special tips: use tile spacers for even joints, and ensure leveling so water doesn’t puddle in bathrooms or balconies.
Doors & Windows: Fit doors (frames, shutters, hardware) and windows (frames, glass panes, shutters). Check alignment and ensure smooth operation (painting or fixing may happen after). For security, some may fit 2nd floor bars or grills at this time.
Painting: Before applying final paint, apply primer to seal the plaster. Choose paints carefully: low-VOC (Volatile Organic Compound) paints are highly recommended. Unlike conventional paints, eco-friendly paints are free of harmful chemicals and heavy metals, greatly improving indoor air quality. For example, zero-VOC or natural paints use safe ingredients (water or plant-based) instead of toxic solvents. Painting should be done in at least two coats for a durable finish. Light colors can make interiors brighter; outside, weather-resistant exterior paints prolong life.
Fixtures & Fittings: Install sanitary fittings (toilets, faucets, showerheads), electrical fixtures (switches, sockets, lights, fans). Make sure to use ISI-marked or certified products for safety. For lighting, consider LEDs for energy efficiency (they use far less power and generate less heat).
Throughout finishing, quality is key. Inspect tile alignments, check that paint is even, and look for any cracks or unevenness in plaster. Any defects should be fixed before moving on. Our team keeps clients involved in finishes selection (tiles, sanitary ware, paint) and provides samples or 3D mockups when possible, so you know exactly what you’re getting. Transparency here means no hidden add-ons at the end – everything is planned in advance.
8. Interiors & Furnishings
With construction and finishes done, it’s time to make the house liveable. The interiors phase includes modular kitchens, built-in wardrobes, false ceilings, and furnishing. Steps include:
Modular Kitchen & Cabinets: If you opted for a modular kitchen, carpenters will install cabinets, countertops, and chimneys. Ensure gas lines and sink plumbing are aligned with the final placement. For wardrobes and cabinets in bedrooms, measure carefully to match the room dimensions and design theme.
Floor & Window Treatments: Lay any final flooring (like polishing wood floors or fitting vinyl), and install window treatments (curtains, blinds, or shutters).
Lighting & Air Conditioning: Fix light fittings (pendants, chandeliers), and hang up fans or AC units. Double-check switches and remotes function correctly. At this time, label the circuit breakers so you (or future electricians) know which switch controls which area.
Security Systems: Install any smart/security devices. This could include digital door locks, intercom panels, CCTV cameras, smoke detectors, or alarm systems. Since wiring was pre-installed, mounting cameras or sensors is straightforward now.
Networking & Entertainment: If you planned for home automation, set up your router, smart hubs, or media projectors. Many homeowners install home-theater systems or smart speakers at this stage, connecting them to the network cabling laid earlier.
After all installations, do a thorough cleaning, construction dust can linger. A final buffing of floors and scrubbing of fixtures often reveals the true beauty of your home. Then, arrange furniture and decor to your taste. This step makes the space truly yours.
Post-Construction Phase
Final touches, quality checks, and handover, this phase gets your home ready for move-in and beyond.
9. Eco-Friendly & Smart Home Features
By integrating green building practices and smart-home technology, you can future-proof your home while saving on utilities:
Rainwater Harvesting: Install a rainwater harvesting system. Many states in India now mandate rooftop rainwater harvesting in buildings. Typically, this involves a drainage system from the roof to underground storage tanks or recharge pits. This reduces dependence on municipal water and replenishes groundwater. Make sure your gutter pipes and down-takes feed into the harvesting system.
Solar Power Readiness: Even if you don’t fit panels immediately, prepare the roof for future solar by leaving unobstructed roof space and laying conduits from roof to main panel. India offers significant subsidies for rooftop solar – up to 40% of installation costs are covered under national schemes. By going solar, you’ll cut electricity bills and lessen your carbon footprint.
Energy Efficiency: Use LED lights, which consume far less power and last longer than incandescent bulbs. Good insulation (including reflective roofing or cool roof tiles) and double-glazed windows can keep interiors cooler, cutting AC use. Orient rooms for cross-ventilation and natural light to reduce HVAC loads.
Eco-Materials: Where possible, choose sustainable materials. Examples include fly ash bricks or AAC blocks (they use waste ash from power plants), reclaimed wood, and non-toxic paints. Low-VOC paints and adhesives improve indoor air quality, which is especially important since we spend ~90% of time indoors. Asian Paints’ “Nilaya Naturals”, for instance, is an organic paint line with 95% natural ingredients.
Smart Home Technology: Plan your home automation infrastructure early. A centralized smart hub or switch system can control lights, fans, curtains, and AC via smartphone or voice commands. For example, a smart switch can replace a regular light switch without needing extra wiring, allowing you to later connect it to Alexa or Google Home. Security-wise, smart doorbells or IP cameras can alert you of visitors remotely. Pre-wiring Ethernet or a dedicated USB power line (USB-C standard wiring is emerging) in each room ensures compatibility with future devices.
Integrating these features during construction is far easier (and cheaper) than retrofitting them later. At Bigger & Bigger, we include “smart-ready” wiring as a standard, and encourage eco-friendly additions. Not only do these save money in the long run, they also make your home more attractive to future buyers.
10. Addressing Common Concerns & Delays
Delays are common in the house construction process, especially due to paperwork issues or unclear planning. Homeowners often worry about delays and cost overruns, let’s tackle those upfront. The key is planning and communication:
Timeline Delays: Monsoons or contractor no-shows can push timelines. Build a cushion into your schedule, especially for rain-prone months. Clear communication is vital: have regular (weekly/monthly) site meetings to review progress. Our practice of transparency means we share a timeline and update clients honestly about any delays (labor shortage, weather, etc.), so there are no surprises.
Cost Overruns: Industry studies show cost overruns often stem from rework, delays, scope changes, and poor planning. Minimize this by finalizing your design early and avoiding last-minute alterations. Fix up-front what’s included in the contract. It’s also smart to buy materials in advance when possible (e.g., ordering tiles early) to lock prices. We maintain strict budget controls and share all bills with homeowners, so every rupee spent is accounted for.
Quality Issues: Inspect work at each stage. For example, check foundation depth, wall plumb, and proper steel covers before plastering. A good builder welcomes client inspections. Our in-house quality team conducts multiple checks during construction to ensure standards are met before moving to the next phase.
Legal & Clearances: Never start without approvals, unapproved construction can lead to demolition or heavy fines. We assist clients in securing all permits, preventing expensive legal headaches later.
Unexpected Situations: Always have contingency funds and be ready to adapt. If material prices soar (steel or cement), a fixed-price contract can safeguard you, or at least alert you early to renegotiate. Good builders factor inflation into contracts. At Bigger & Bigger, we often lock material rates in bulk procurement to minimize this risk for clients.
By proactively managing these issues (and working with an experienced team), you greatly reduce stress and keep your project on track.
11. Final Inspection, Handover & After-Sales Support
When construction is “complete”, a final round of inspections ensures everything is in order:
Quality Walkthrough: Together with your contractor, walk through each room. Test every switch, faucet, door, and window. Check that walls and floors are free of cracks, and that paint is even. If any snags appear (e.g. minor cracks or loose tiles), note them for correction.
Compliance Check: Ensure all work follows local building codes. This might include a safety inspection (e.g. structural adequacy, electrical earthing) by a professional, if required. Obtain the Occupancy Certificate (OC) from the municipality to legally occupy the home (this involves an official inspection in many cities).
Documentation: Collect all manuals/warranties for equipment (ACs, Geysers, Solar inverter, etc.). Keep copies of structural drawings and approvals for future reference.
Handover: Hand over the keys and official documents to the owner. We usually prepare a “handover kit” containing all necessary papers, and walk the owners through how things work (e.g. reset the trip switch, use the alarm panel, maintain the solar system).
Finally, remember that in-house design & execution and post-handover support truly set professional builders apart. At Bigger & Bigger Home Solutions, we stand by the homes we build. We provide a warranty period (usually 1 year) where we’ll fix any construction defects at no extra charge. We also offer guidance on maintaining your home, from how to care for wooden floors to tips on rainwater tank upkeep. Many contractors fade away once construction ends, but our philosophy is that we’ve built a relationship, not just a house. This means you can reach out anytime with questions or issues, and we’ll help as if it were a part of our own home.
Conclusion
Building a house in India is a journey with many moving parts, but with careful planning, the right team, and a transparent process, it can be a rewarding experience rather than a headache. We covered each step: from gathering requirements and designing with personalization, to securing permits and laying a strong foundation, through superstructure, MEP, finishing, interiors, and final handover. By incorporating eco-friendly practices (rainwater harvesting, solar power, low-VOC paints) and smart home technology (wiring for home automation, security systems), you not only make your home modern and sustainable, but also cost-effective in the long run.
Delays, cost escalations, and legal hurdles are common concerns, but they can be managed with forethought: build in contingencies, lock in prices early, and follow regulations to the letter. Throughout, communication and transparency are key – your builder should keep you updated and involve you in decisions. This is exactly the approach of Bigger & Bigger Home Solutions, where our Bangalore roots help us serve clients pan-India with local know-how. Our in-house team of architects, engineers, and contractors means a unified workflow, fewer misunderstandings and more consistency.
Your new home is one of life’s biggest milestones. By following this guide step-by-step (and choosing a partner who values personalization and support), you’ll move in with confidence rather than worry. Here’s to turning your dream house into a lasting reality!


Comments